There are plenty of great things about Glock pistols. Their innovative design (at the time) and unmatched reliability have made them a staple for militaries, police forces, and civilians around the world. It’s like the pistol version of the AK platform.
I happen to love my Glock 19, but I’ll admit it’s far from perfect. One of the biggest issues (to me) is the stock Glock triggers. They’ve got a mushy, long trigger pull that lacks the crispness of other striker-fired pistols (like the P320).
I’ve wrestled with this problem for years, and now it seems like there’s finally a solution.
Enter the Glock Precision Trigger. Glock announced these new triggers at SHOT Show this year, and I finally got around to picking one up. It takes a little bit of minor gunsmithing to install the new trigger, so I rolled up my sleeves and got to work.
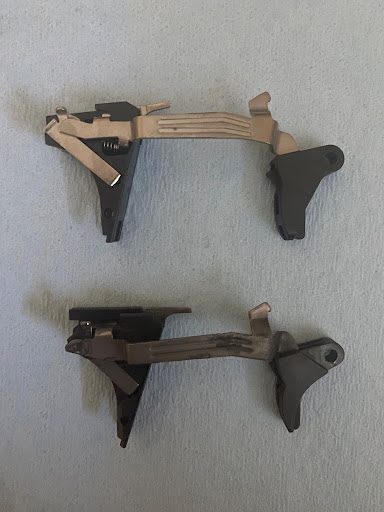
Glock Performance Trigger (above) and standard trigger (below).
Glock Performance Trigger Install: Step-by-Step Guide (with pictures!)
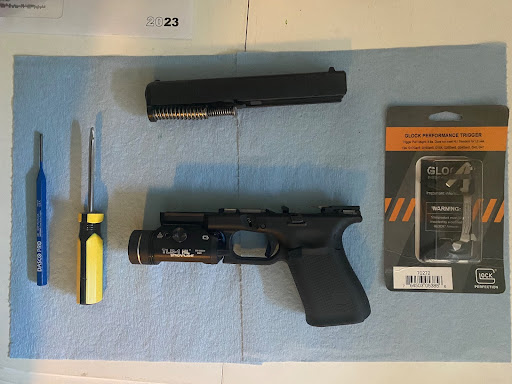
Fortunately, you won’t need many tools to install a Glock Performance Trigger. Grab a flathead screwdriver, a pin punch (I used 3/32), and a mallet with a rubber or plastic head.
As I mentioned earlier, this is a pretty easy job. Just follow these steps and you’ll have your new trigger installed in less than 10 minutes.
Step 1: Remove Slide
This should be one of the easiest parts of this entire process. Just remove the slide by pulling it back and pulling down on the slide lock. The slide should then move forward and off the frame on its own.
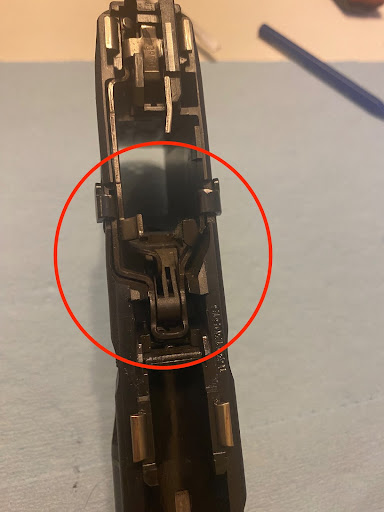
Step 2: Remove Retaining Pins
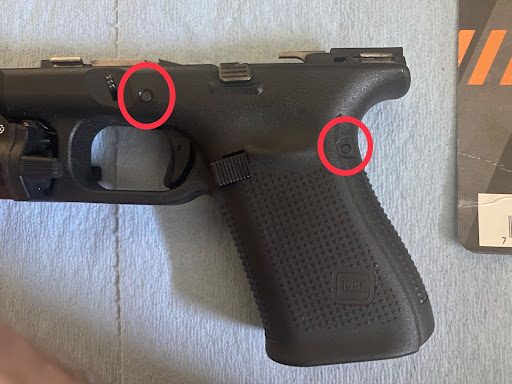
Here’s where things start getting interesting. Use the pin punch and mallet to remove both the trigger pin and trigger housing pin (circled in red).
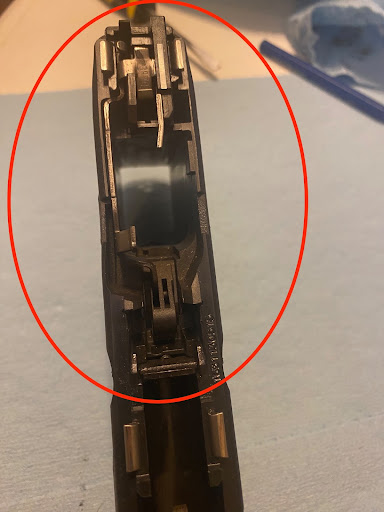
Step 3: Remove the Locking Block
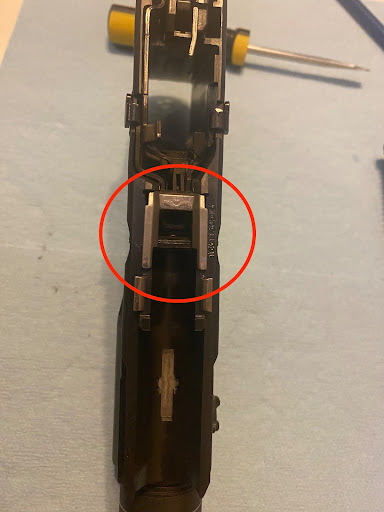
Next, use the flathead screwdriver to pop the locking block out of the frame. It should come out pretty easily. Since I’m so strong, I sent mine flying across the room.
Step 4: Remove Slide Stop Lever
One last obstacle stands between you and removing the standard Glock trigger group: the slide stop lever. The locking block usually holds this part in, so after you remove it, the slide stop lever will come out easily.
Step 5: Remove Old Trigger Group
Now it’s time to get rid of your old trigger group. It’s a pretty big piece—I started from the back and the entire thing popped out.
One thing that I didn’t anticipate about this entire maneuver was how dirty my locking block, slide stop lever, trigger group, and even my retaining pins were. I paused here to give everything a good wipe down.
Step 6: Install New Trigger Group
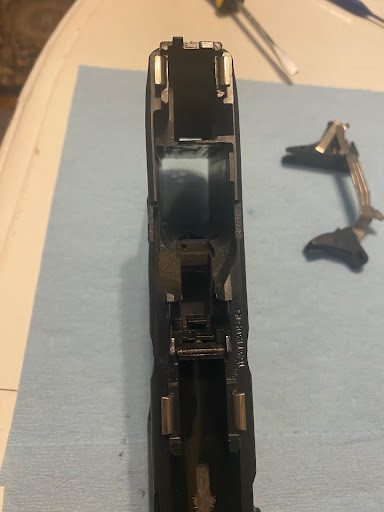
Your Glock should now look like this. Since you’ve got all of that empty space, it’s time to install the Performance Trigger. It should slide in pretty easily. I applied more pressure to the back, and the front (the actual trigger) slid in pretty easily.
Step 7: Install Slide Stop Lever, Install Locking Block, Replace Retaining Pins
After you get the new trigger group back in, you just need to work your way backwards to reassemble your Glock. The pins may take a little “percussive therapy” to replace. Remember to use finesse—don’t just bang on them like a drummer.
Step 8: Replace Slide and Function Check
Now that you have the frame fully assembled, it’s time to reattach the slide. Do that (attaching it from the front of the pistol and sliding it to the back), and then rack the gun a few times. Give the trigger a few pulls to make sure it’s working correctly—and savor the feeling of that slick new upgrade.
Glock Performance Trigger Review: Initial Impressions
As soon as I function checked my Glock after reassembly, I was happy with the Performance Trigger. It solves my main issue with stock Glock triggers: the “mushy-feeling” trigger pull. There’s significantly less uptake before the trigger breaks, and once it does, it’s crisp and consistent.
I can’t wait to get this thing out to the range—I’d bet money it’ll help improve my accuracy. I usually shoot low left with Glocks specifically (and not with a P320 or 1911), and I’m hoping this will help fix that problem. Stay tuned!
Learn More About Gunsmithing at SDI
Installing a new Glock Performance Trigger is an easy piece of do-it-yourself gunsmithing. But if you want to break into the gunsmithing trade for real, you’ll need significantly more knowledge than this job requires. SDI is the best place to learn those skills. To learn more and check out the programs we offer, click here.
RELATED STORIES