We recently started showing you how to install a Texas Weapon Systems Dog Leg Rail and made it through a difficult portion of that. Today, we’re here to finish the job with part 2! Let’s pick up where we left off.
Step 4: Install Nut Plate and Hinge Base
Now that you’ve revealed your AK’s gaping chasm, you’re ready to start installing the first parts of the TWS Dog Leg.
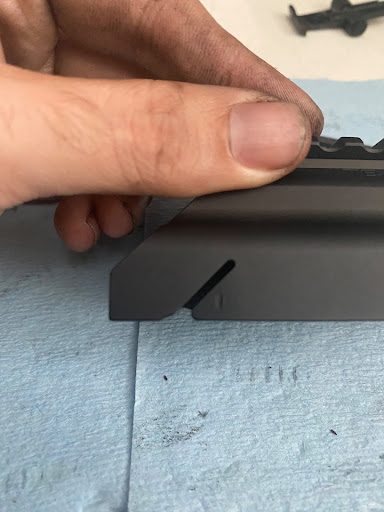
First, install the nut plate with the cutaway facing downward. When you’re done, it should look like this.
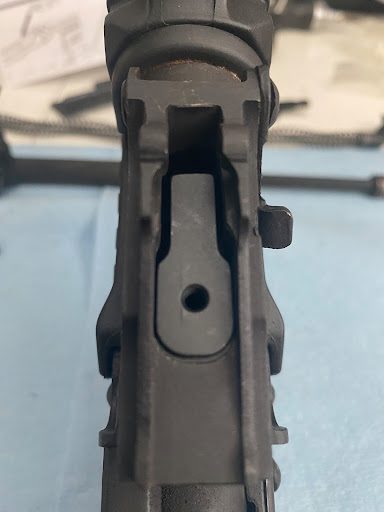
After placing the nut plate into the gaping chasm.
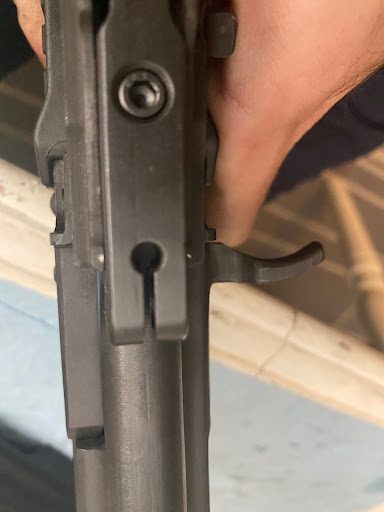
Step 5: Install Hinge Base and Pin
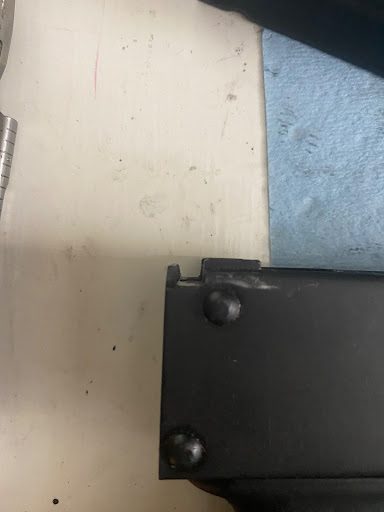
Next, install the hinge base and pin. The hinge pin passes through the holes that previously held the sight leaf in place with the hinge base between them. Install the hinge pin from right to left (when looking down the sights), otherwise there will be a tab of protruding metal that will prevent you from disassembling the gun in the future.
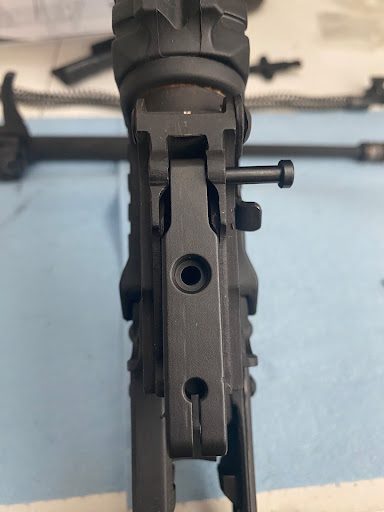
Hinge plate and hinge pin.
Step 6: Install Socket Head Cap Screw Through Hinge Base and Nut Plate
Now you’ll need to screw everything down to attach it to your gun. Place a dab of Blue Loctite on the bottom of the socket head cap screw and then thread it down into the hinge base and nut plate.

Apply Loctite and thread into this hole.

Tighten the socket head cap screw using the Allen wrench that came in your kit.
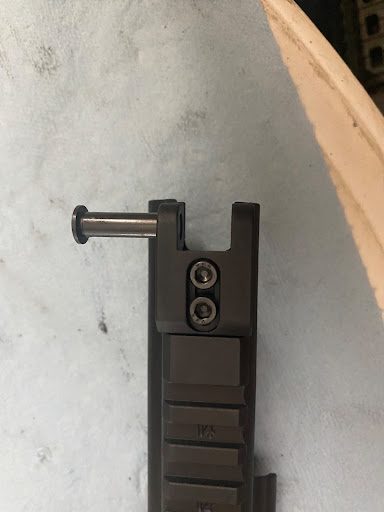
Step 7: Attach E Clip to Hinge Pin
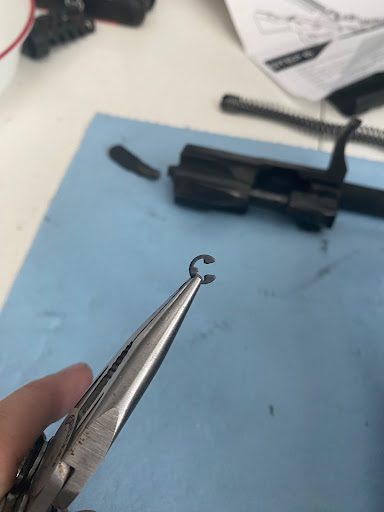
Now it’s time to use one of the smallest parts in your entire kit: the E clip.
“I WAS IN THE POOL!”
Clip this little guy onto the left side of the hinge pin to hold the hinge pin in place.
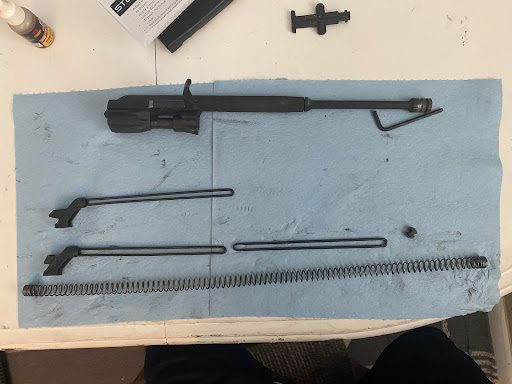
Step 8: Take Your Recoil Spring Assembly Apart
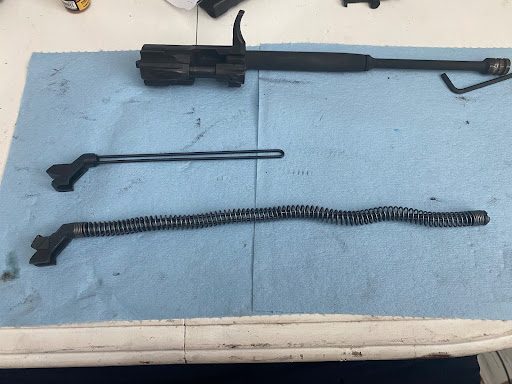
Standard recoil spring assembly (below) with Texas Weapon Systems replacement cover release button (above).
Steps 7 and 8 are some of the most frustrating parts of this entire process. That’s because you have to work with parts that are under some serious spring tension, and they’ll do everything they can to escape your grasp. So, you’ll need to have a grip as strong as the one communism had over Eastern Europe during the Cold War to overcome with your AK’s recoil spring assembly. Needless to say, you’ll want to use eye pro for this step.
To take your recoil spring assembly apart, put the end with the cover release button (the tab that holds the dust cover in place) against something sturdy, like a table. Then, take the top of the recoil spring (the part closest to the ceiling) and pull it downwards.
When you pull it down far enough, you should be able to separate the two metal tabs that hold the recoil spring retainer (the small circular piece that holds the spring onto the rest of the assembly).
When you spread these tabs apart, you can remove the retainer. Then, slowly release tension on the spring. You can now remove the spring from the assembly.
Step 9: Rebuild Recoil Spring Assembly with New Cover Release Button
Fully disassembled recoil spring assembly.
Before you go any further, you need to examine Texas Weapon Systems’ new cover release button. Check it to make sure it fits smoothly into the T-shaped groove in your rear trunnion. If it doesn’t, you might need to sand down the bottom of your cover release button. Mine fit nicely, so I didn’t have to worry about that. Regardless, make sure you add a drop of oil into the T-shaped groove in your rear trunnion to ensure smooth function.
Now it’s time to rebuild the recoil spring assembly with the new cover release button. To do that, remove the old cover release button and replace it with the new one. Then, rebuild the recoil spring assembly by feeding the two metal pieces through the center of the spring (like a burrito). Push down on the spring (the same way you took it off) and replace the recoil spring retainer.
Step 10: Optional Adjustments
Finally, the people at Texas Weapon Systems realized that when you’re working with AKs, tolerances tend to be loose. That’s not great when you’re trying to install an optic that will maintain zero.
That’s why the folks at TWS built three different adjustment points into the Dog Leg mount. You can find one on the hinge base.
If you’re feeling your Dog Leg wiggling around at this joint, you can tighten it by putting a flathead screwdriver between the two prongs and whacking it with a mallet.
The second adjustment point is a small metal tab on the rearmost side of the railed dust cover.
If you feel your Dog Leg moving around at the rear of your rifle (towards the stock), you can tighten this tab by pulling it inwards with a vise grip.
You’ll find the final adjustment point at the hinge fork.
You can loosen the screws here to adjust how far back the dust cover sits. You want it to sit as far back as possible in this notch on your rear trunnion.
To adjust it, loosen the screws, position the dust cover as far back as possible, and then tighten the screws with some Blue Loctite.
This was the only adjustment point that I actually had to mess with on my Dog Leg. The rest of the mount was super tight, and I didn’t want to mess with it.
Reassembly and Function Check
At this point, you’re almost done! All you need to do is reassemble your AK by replacing the bolt carrier group and recoil spring assembly. After you do that, lower the Dog Leg dust cover and snap it into place using the back of the recoil spring assembly—the same way you would with a regular dust cover. Rack your bolt twice to make sure the Dog Leg is seated properly.
Finally, you’ll want to function check your AK to make sure everything is working properly. While I was function checking my gun, I racked the slide a few times and found that sometimes the bolt stuck open. I thought I bent my recoil spring at first, but after racking the gun a few dozen times, it started to function normally.
All in all, I’m pretty happy with the TWS Dog Leg so far. The mount feels solid, and I feel totally comfortable mounting a light optic on it, like a red dot. I have a Primary Arms red dot and microprism that I’m going to mount on it to see if it holds zero through a few magazines.
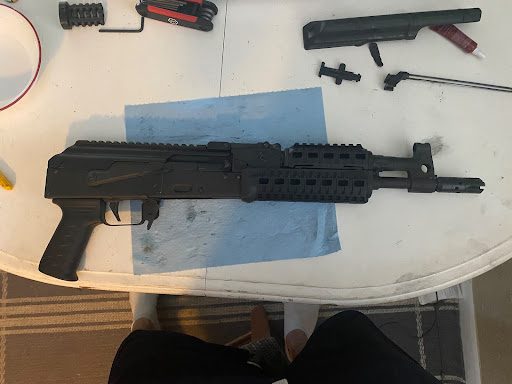
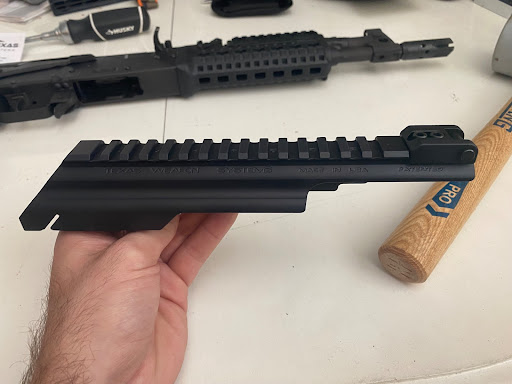
My M+M Pistol decked out with its new TWS Dog Leg. Why yes, I did install an ALG trigger on it a while ago… thanks for noticing!
Learn More About Gunsmithing at SDI
Do you love working on guns almost as much as you love shooting them? At SDI, you can learn all about how firearms work. To explore the programs SDI offers, click here.
RELATED STORIES