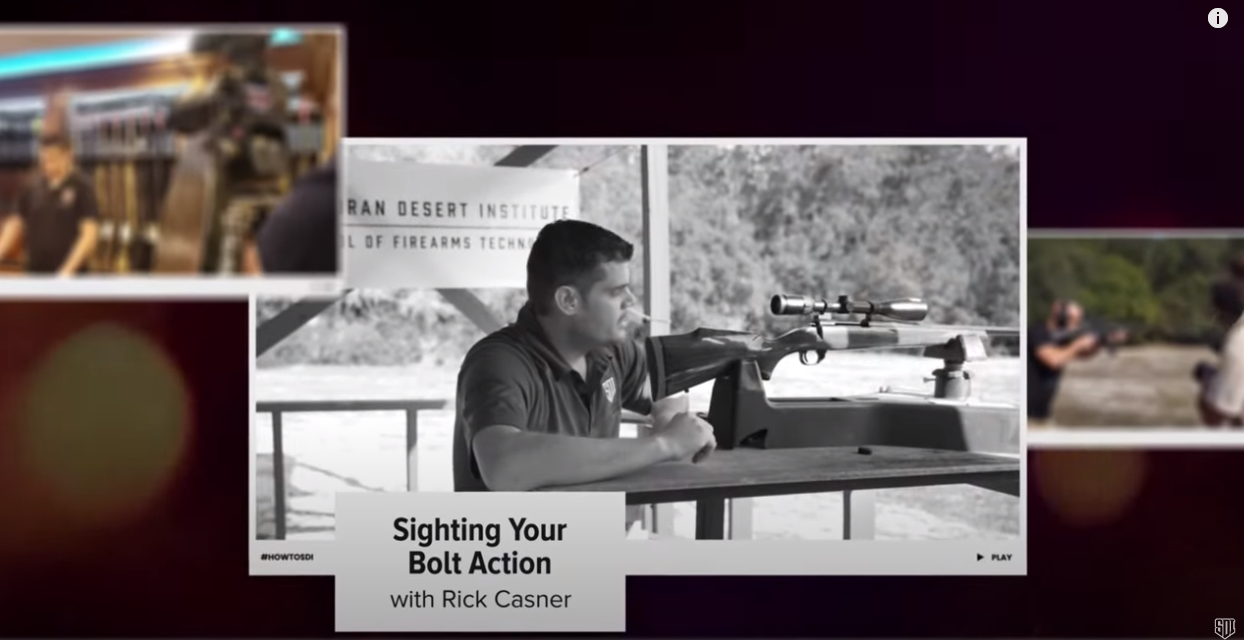
It’s no secret that a scope makes it easier to reach out and touch your target. However, the best scope in the world will be completely useless if you don’t zero it in. Zeroing a scope involves firing practice shots and adjusting your optic so that it has the same point of aim as your rifle. It may sound complex, but never fear. SDI’s own Rick Casner is going to help us when he explains how to zero a rifle scope in his newest video.
How to Zero a Scope
Rick explained how to mount a scope to a rifle and get a loose “zero” with a boresight. But if you’re trying to hit sub-MOA groups with your bolt gun (which should be your goal with a high-end gun), you’re going to need your gear dialed in.
Next, Rick mentions how the way he likes to adjust a rifle scope isn’t the same technique that everyone else uses. Instead of bringing his shots to the reticle, he brings the reticle to the shots. This means that he never needs to get up and walk over to his target. It’s actually a pretty ingenious technique.
Rick opens up by adjusting his diopter to make sure his sight picture is in focus. Then, he pops off a three-shot group at 100 yards. He does mention that there are some situations where he might use a five-shot group (like if one shot seems to be an outlier), but usually he sticks with three.
How to Adjust a Rifle Scope
After checking out his grouping, Rick determines that he needs to adjust 4.5 in. to the left for windage, and just about a half inch down for elevation.
Using his technique, Rick brings the reticle’s point of aim to where his first shots hit instead of trying to dial his reticle in to hit the target’s bullseye. Many of us have learned to adjust our groupings by moving them towards the bullseye, but Rick’s technique will actually end up saving you time and effort.
When he returns to his shooting booth, Rick brings out the metaphorical big guns. Instead of shooting from a sandbag, he’s using a full-fledged shooting stand. This provides a more rigid base for his rifle, and it will allow him to adjust his scope without affecting his point of aim.
There’s one last thing to remember when using Rick’s technique. The turrets of a scope are designed to bring shots to a reticle, not a reticle to shots. As a result, you’ll need to make adjustments backwards on the scope.
Post-Adjustment Shots
After making his adjustments, Rick removes the shooting stand and replaces it with the more comfortable sandbag. After letting three new shots go, he notices that he had a few “fliers.” So, he takes another two shots to see if his scope’s accuracy and grouping have improved.
After his next two shots, Rick notices something. Although his shots are hitting fairly close to his point of aim, his groupings aren’t all that tight. He deduces that this is the result of the ammo he’s using. At this point, he’s gone as far as he can go adjusting his rifle scope. Since he wants to zero his scope for a specific type of ammunition, he’ll have to switch out the type of cartridges he’s using before he continues.
Learn More About Firearms at SDI
Sighting in a rifle is a pretty simple task in the grand scheme of gunsmithing. But other tasks take a lot more knowledge and skill, and SDI is a great place to get that know-how. You can check out all of the classes we have available when you click here.
RELATED STORIES